For a while now I have been searching for a cost-effective sensor to put on my garden gate which will send me a push notification when the gate is opened/closed. So far my search has found nothing which is close to what I want.
There is a large selection of SmartThings compatible sensors out there, but they all appear to be from the Japanese or Chinese market and will require some “hacking” to get them to work. Plus I don’t really want to invest into one home automation system over another currently as it is not clear what the future holds for the sector. Will Apple HomeKit become the dominant one or will it be SmartThings? It is far too early to tell.
Having just learned the ins & outs of Node.js for some projects at work, I have decided to build my own.
My plan is to have a sensor on the back gate which can detect when it is open or closed. This will share data with a machine running Node.js which will then trigger an IFTTT Maker Webhook to send a push notification to my phone. The theory of this seems quite simple & it will also be extendable. Carry on reading to find out how.
Hardware
Recently a friend at work told me the look at the Puck.js as it may be useful as the sensor.
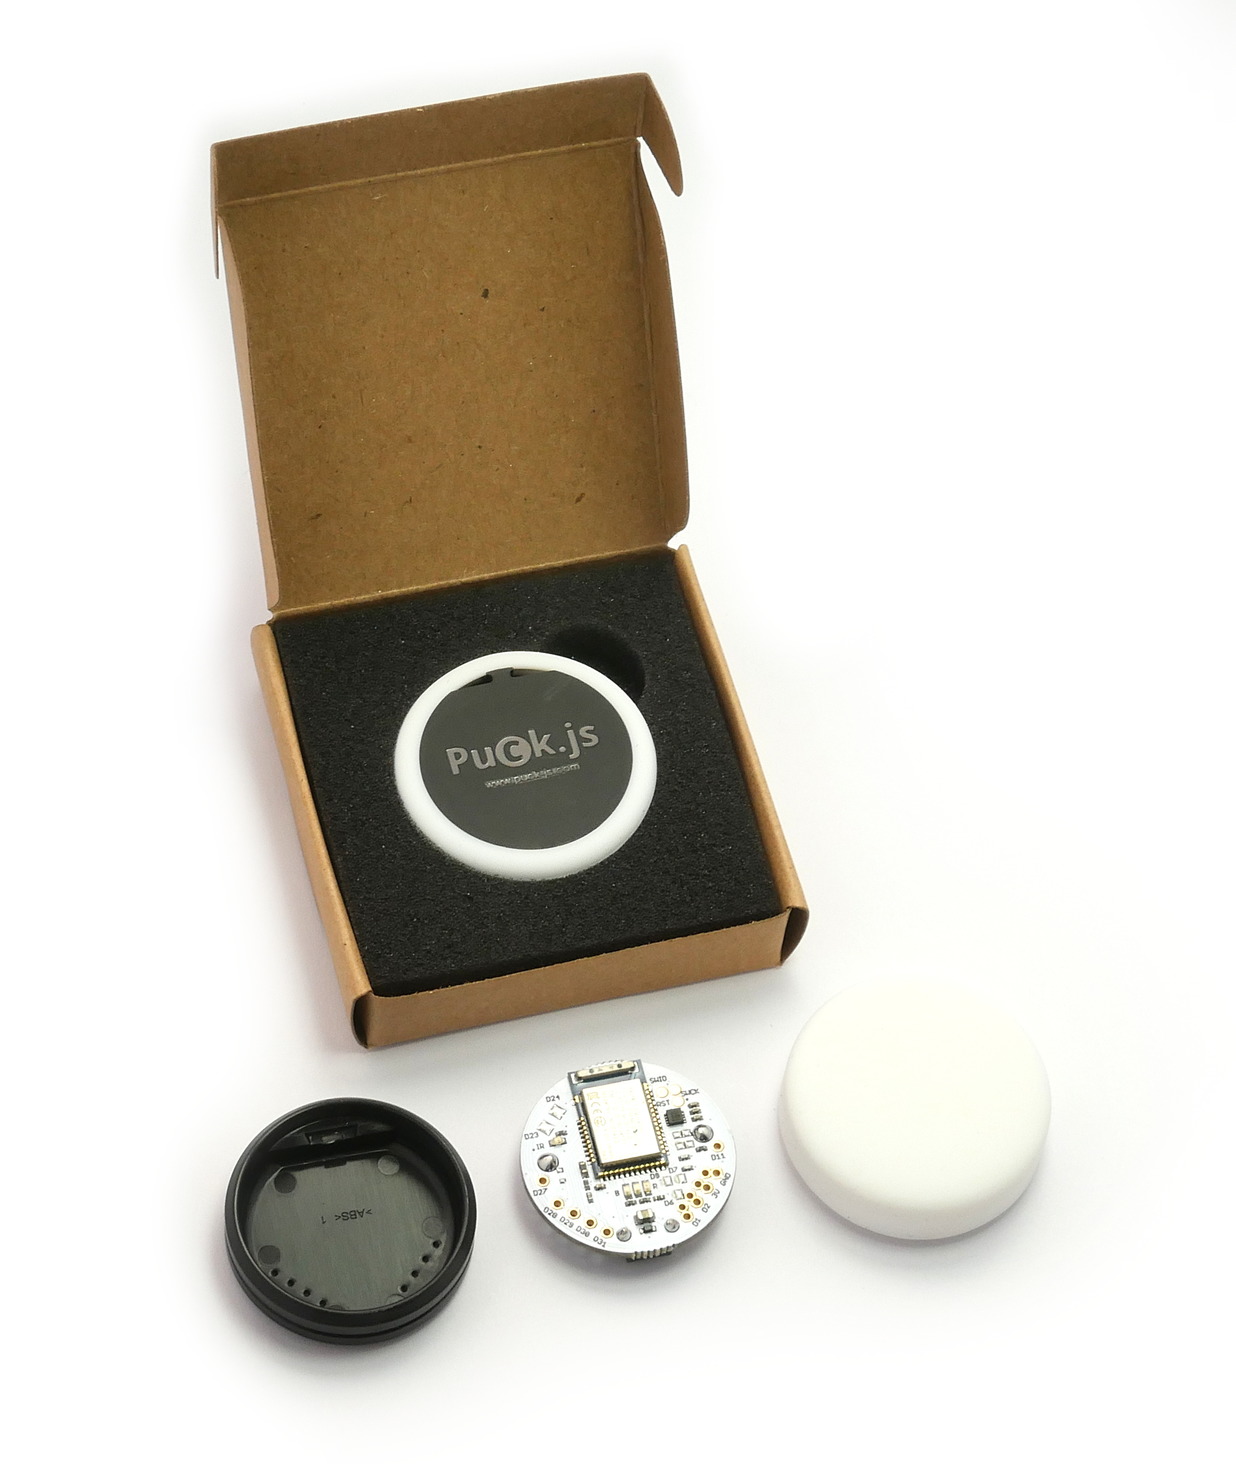 This small little device runs the Espruino JavaScript interpreter meaning it can be programmed using vanilla JavaScript. It has a selection of sensors already on its small PCB allowing it to measure light, temperature, magnetic fields & capacitance, control infrared devices (IR), produce any color light & it has a tactile switch that turns into one big button. It also has BLE (Bluetooth Low Energy) allowing it to communicate with other BLE devices.
Having a magnetic field sensor & BLE means this will be the ideal sensor – this will be attached to the gate post & a small magnet will be attached to the gate itself. When the magnetic field changes, this is how the gate opening/closing will be detected, which will then trigger a message being sent over Bluetooth.
The receiving Bluetooth devices will be a Raspberry Pi Zero Wireless.
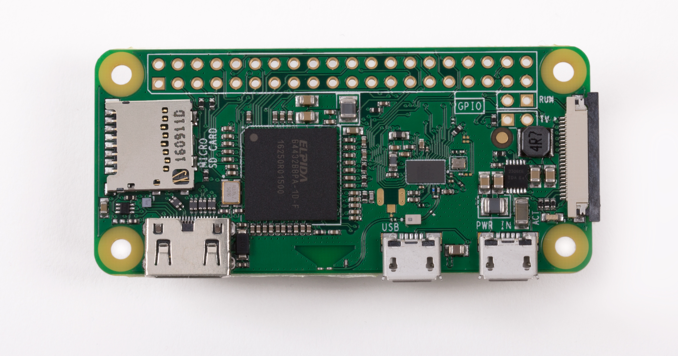
This is the latest in the range of Raspberry Pi boards & it is tiny. It has the same spec as the Raspberry Pi Zero but also has Wi-fi (02.11 b/g/n wireless LAN) & Bluetooth (4.1 + BLE).
The cost, size, and features of this Raspberry Pi make it ideal for this project. It can run Node.js meaning it can be programmed using vanilla JavaScript. It can receive a message from the Puck.js over Bluetooth, then over Wi-fi trigger the IFTTT Maker Webhook to trigger the push notification.
In theory, these two small pieces of hardware will allow me to build a gate sensor which will do exactly what I want. Cost wise, so far I have spent less than £50, which also includes the power supply, case & small adaptors for the Raspberry Pi.
How It Will Be Extendable
The Raspberry Pi will just be a Node.js server which can be programmed to do anything I want. I could buy another Puck.js and use it as a sensor on the front door which would trigger a different push notification.
I could build a web interface running on the Raspberry Pi which will trigger Node.js to send various different messages over Bluetooth. One of these could be to another Puck.js which will then use the built-in IR blaster to control an IR light bulb or switch.
I could add more temperature sensors to a smart thermostat, such as a Nest or Hive, to give more granular heating control. I could place a Puck.js somewhere that I want to monitor the temperature, then based on temperature sensor readings, send data to the Raspberry Pi where Node.js will communicate with the smart thermostats API.
Next Steps
Start writing some JavaScript.
The theory is not too tricky & nor should the code be. The Puck.js is battery powered so coming up with an efficient way of not draining the battery too fast is important. Security is also a factor but following security best practices on both the Puck.js & Raspberry Pi should be ok.
The BLE library documentation is a little sketchy so it’s going to be fun playing with the code.
In my next few articles I’m going to document my experiments right through to the finished project.